
The practical and useful design of the Discovery never fails to amaze me. It’s a unique blend of Land Rover engineering that accommodates passengers and cargo easily. The simple, yet sophisticated design of the large tailgate door provides a great example, and a chance to hone your maintenance skills.
I have always liked the design aspect of the swinging door, as opposed to an upwardly mobile hatch. That said, the swinging door comes with maintenance need in order to work properly for the long haul. And I can assure you, there is nothing much worse than the largest door on the vehicle not working. It might be second in the pecking order only to the driver’s door.

So far, I gained in-depth experience on three different Discovery “tailgates.” The rear door assembly is a big, heavy piece of clever engineering. On the inside of the rear opening, weather strips should be clean and tight. At that critical threshold between the indoors and outdoors, gloriously curved plastic rain gutters direct water away from the door seals. These functional items keep water out, protecting the carpet and optional seats inside the cargo area itself.
The inside of the door has a large grab bar, a lock and latch, a bass subwoofer and a nifty storage compartment.
Through the large window there is a wiper arm with blade and washer fluid. Swing the door closed and you have a full spare tire and wheel mounted to a carrier, which has a hard life. The outside latch is sheltered under a plastic molded housing that also carries the bulbs that illuminate the license plate itself.
On my Discoverys, I prioritize set up and maintenance based on the most important goal of safety.
Visibility stands at #1. Even if your tailgate has seized and remains shut, you still need visibility out the rear window. When driving my Discovery, I want to know how close other vehicles are to my bumper.

The side view mirrors don’t offer much view to the rear; the rear view mirror is about useless if the rear glass is dirty. So, I always check to make sure that the rear wiper arm is tight, lubricated, working properly, has an intact wiper blade and plenty of washer fluid.
Functionally, the tailgate door swings on two robust painted hinges that bear the weight of the door. A damper arm underneath limits the outward swing. This protects the hinges (or door edge) from bending if swung open too far. With the spare mounted on the door, it can get considerable momentum in either direction.
Keep those hinges clean and well-lubricated. The exterior door handle lives in tough conditions on the rear door. It can ease with dried and corrosion. Happily, It’s pretty simple to keep them clean and lubricated yourself. And it is best to use the door frequently to help the lubricant work its way into the latch mechanism.

The door latch sits inside a molded plastic housing intended to protect it. The same housing holds the license plate light fixture and bulbs. If the housing is cracked or broken, it can’t do its job. It’s worth considering replacement if necessary, to better protect the working elements.
This becomes a fantastic opportunity to do even more for your tailgate door, because removing the housing requires tearing into the door interior. The first time I started pulling door cards from my Discovery scared me — not so much at what I might find, but what I might break in the process of repairing something else.
The door card is held in by plastic snap rivets. Being old plastic, they can break if you use too much leverage, but fortunately, Rovers North carries the rivets and their holders. It’s easy to find a door card pull tool at any auto parts shop or store. The subwoofer and its enclosure, as well as the inner latch cup, come off next. Reduce later frustration by keeping track of what screws came out of where; photographs of each step will help guide you. Once you get inside the door, consider a spray can of Waxoyl cavity wax to prevent rusting of the steel components.

In the case of the latch housing, replacing the license plate bulbs suddenly looks really easy at the end of this task.
Every winter, I become hyper-vigilant about the rear end of our Discoverys. In muddy or slushy road conditions, it is remarkable how dirty the rear end of a Discovery will get. I do not think I have owned a vehicle where the rear is routinely dirtier than the front. Keeping the lenses clean and inspecting for cracks that would allow water intrusion is a good habit.
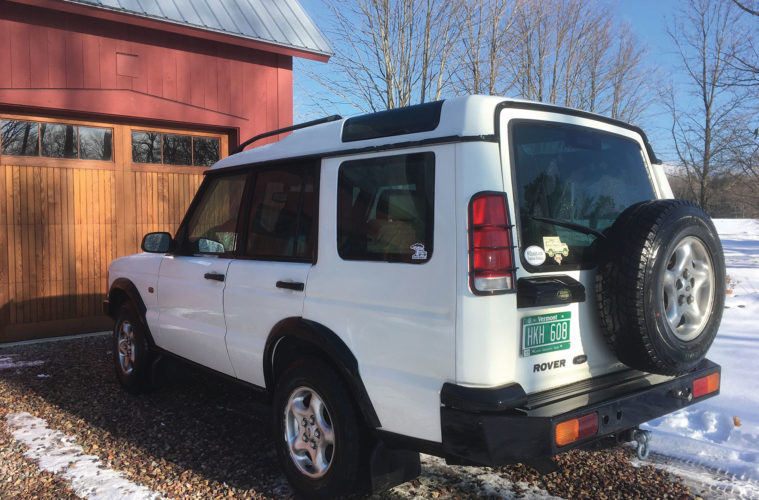
My wife drives a white Discovery II. We live in Vermont where winter driving means occasional white-out driving conditions. Worse yet, with extreme cold, road salt might prove ineffective in melting ice on roads. I want our Discoverys to be visible in all conditions, so I try to make sure that our rigs are well-illuminated in the rear.

While there are only 3 bulbs in the door itself (two plate lights and the third brake light in the glass), there are 13 bulbs on the back side of the truck. A good screwdriver or two will make repairs easy. If you remove and/or replace a bulb, consider dabbing some dialectic grease on the bulb’s tip before inserting it back into the socket. With availability of some complete units dicey, don’t over tighten lenses when you put things back together; snugging up the screws is enough. That way, you don’t risk cracking items or compromising seals.
I am sure most Discovery owners would agree that the rear of end of a Discovery seems to attract dirt. Sometimes, I hose and sponge just the rear end because it is dirty and the rest of the rig isn’t.
Staying on top of the rear of your Discovery can save you a trip into a shop for service, a law enforcement stop on the road, or even a rear end accident. Plus, it is fun to see your rig lit up looking good and safe at night. And the more you do small repair items, the better and more confident you get about taking care of your Discovery.